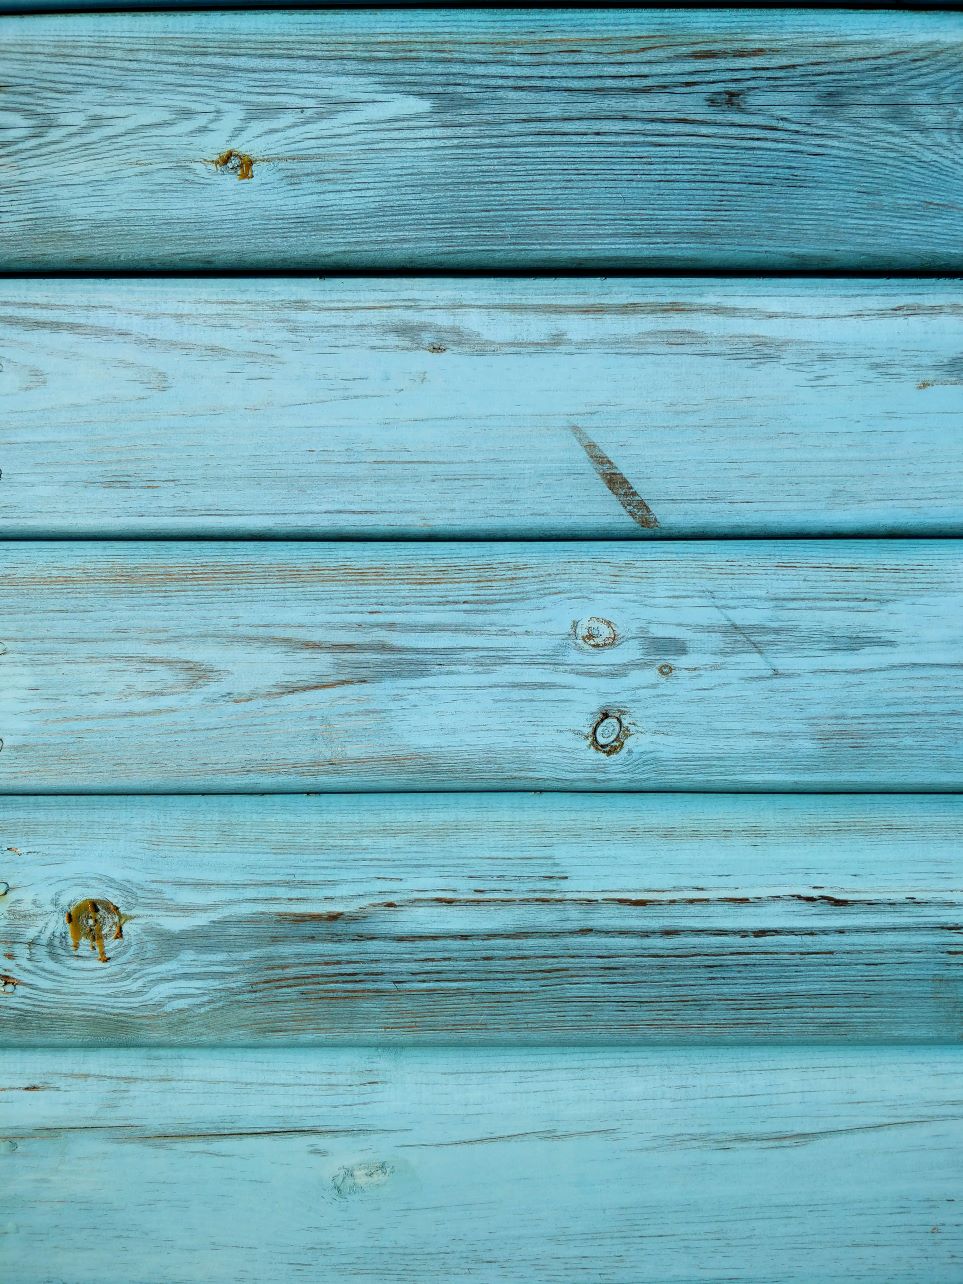
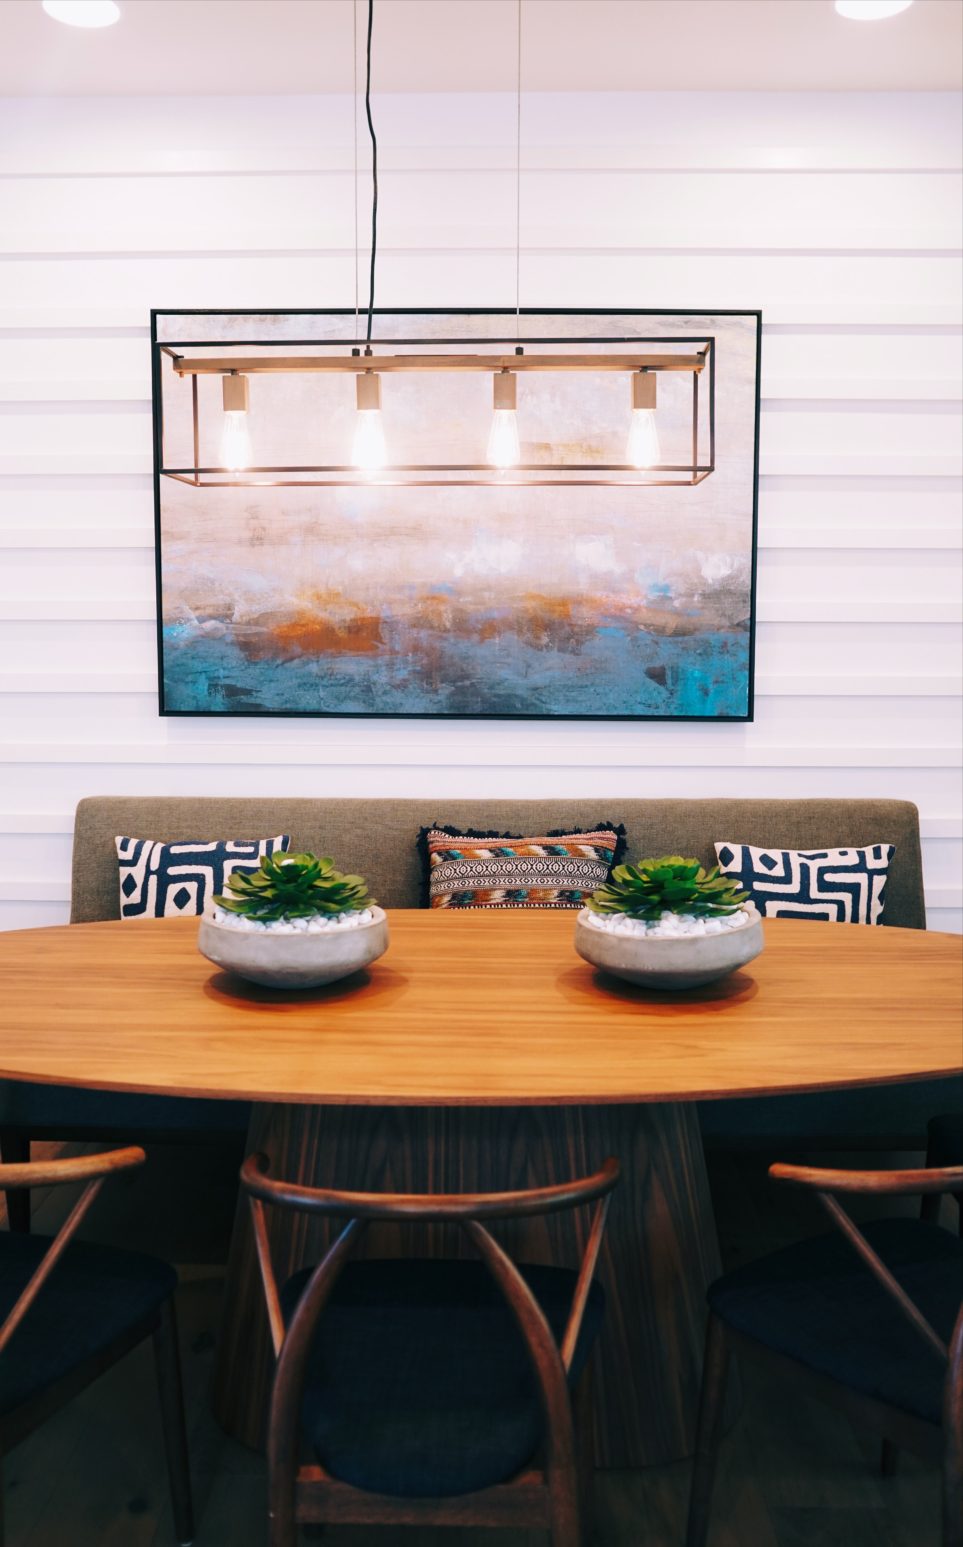
Who doesn’t love the look of shiplap? If you aren’t familiar with it, it’s a construction style in which wooden boards are fitted consecutively (usually horizontally but sometimes vertically) to form a neat and attractive wall covering. Often applied for a nautical look, shiplap was originally used to make ship construction tight and waterproof. Many people outfit a bathroom or entire house with it for a beach house or coastal theme. Outfitting your own walls (or ceilings, or bookshelves, or other surfaces) in shiplap can add class and visual appeal to your space. It’s a great project if it’s in your budget. However, if you aren’t sure about shiplap but want to try it out temporarily, or if a real shiplap makeover isn’t in your budget, you’re in luck: shiplap peel and stick wallpaper is a perfect alternative!

Peel and stick wallpaper is a type of wall covering that you apply without any glue or permanent changes to your walls. It’s removable, which makes it perfect for people who want to change their wall colours without painting or applying permanent wallpaper. It does take careful effort and constitutes some prep work and time, but not as much as painting or applying permanent wallpaper would. You need only buy however many rolls required to cover a space and, with the aid of an X-Acto knife, can transform that space in a day or less.
Disclosure: This post contains affiliate links, which means I may receive commission if you click through the link and buy a product. As an Amazon Associate, I also earn from qualifying purchases through those links. Please know that affiliate links don’t affect prices in any way.
The Alternative to Real Shiplap: Peel and Stick Wallpaper
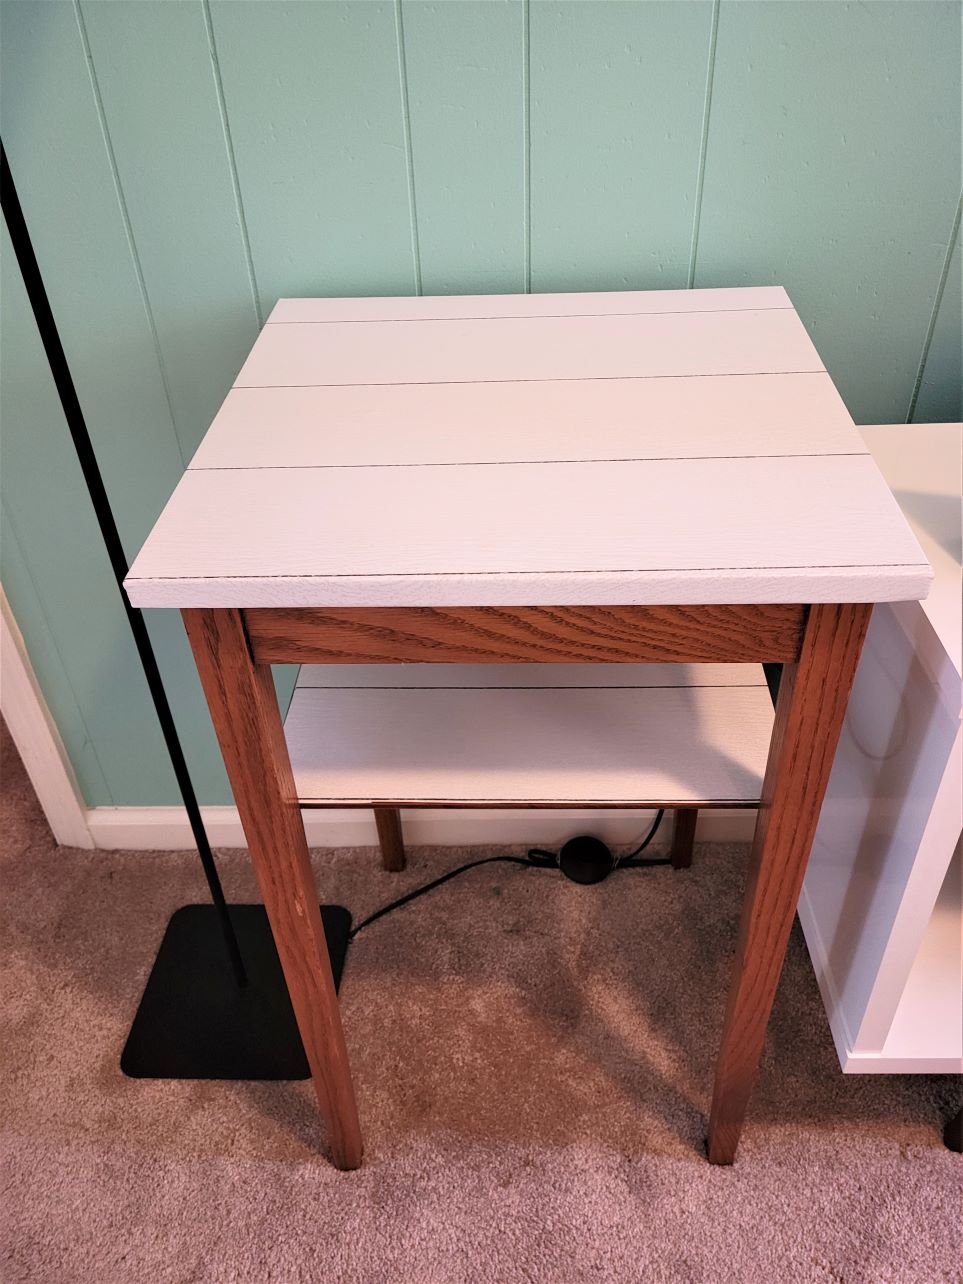
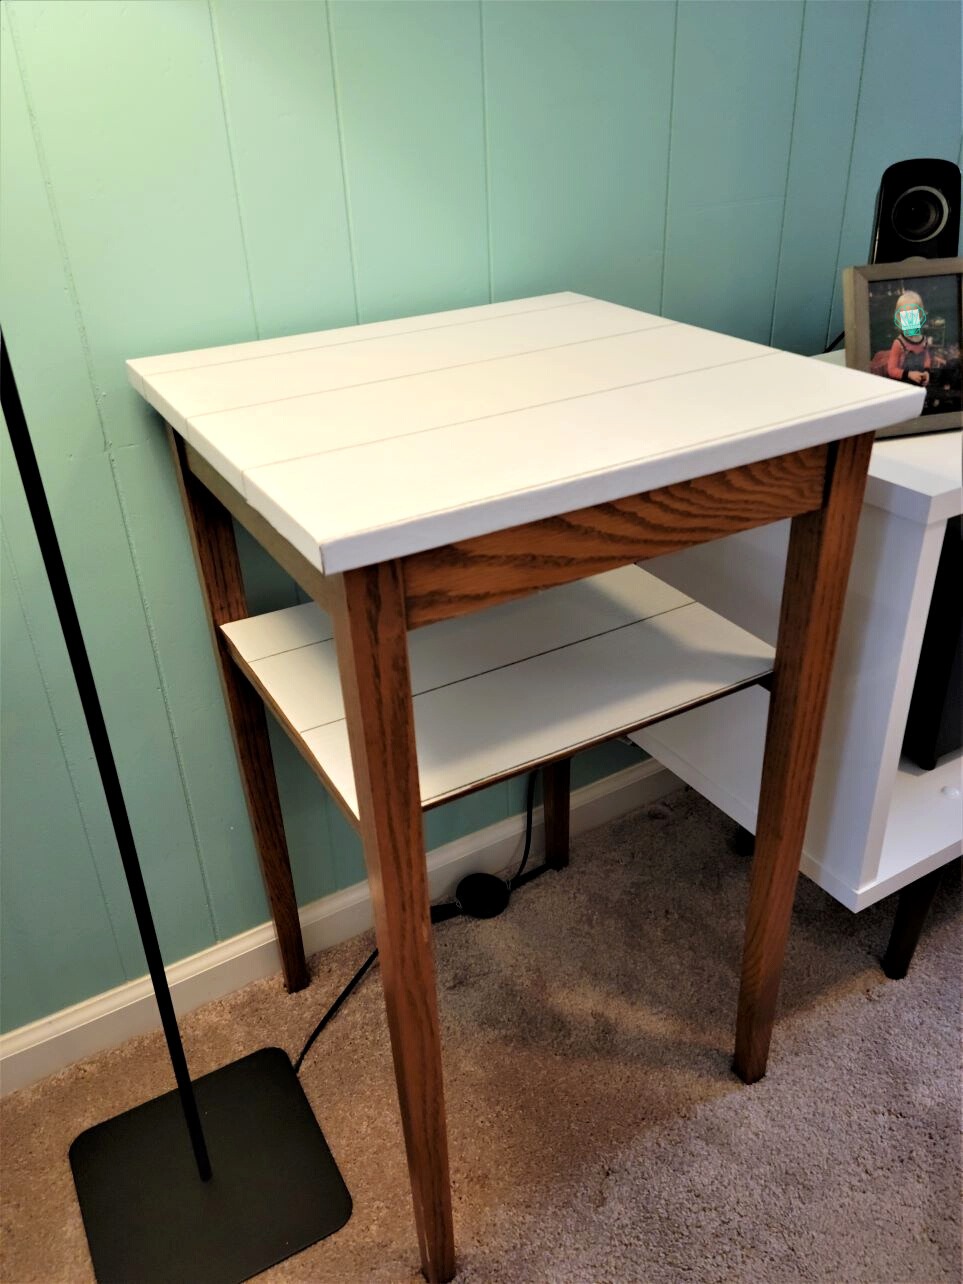
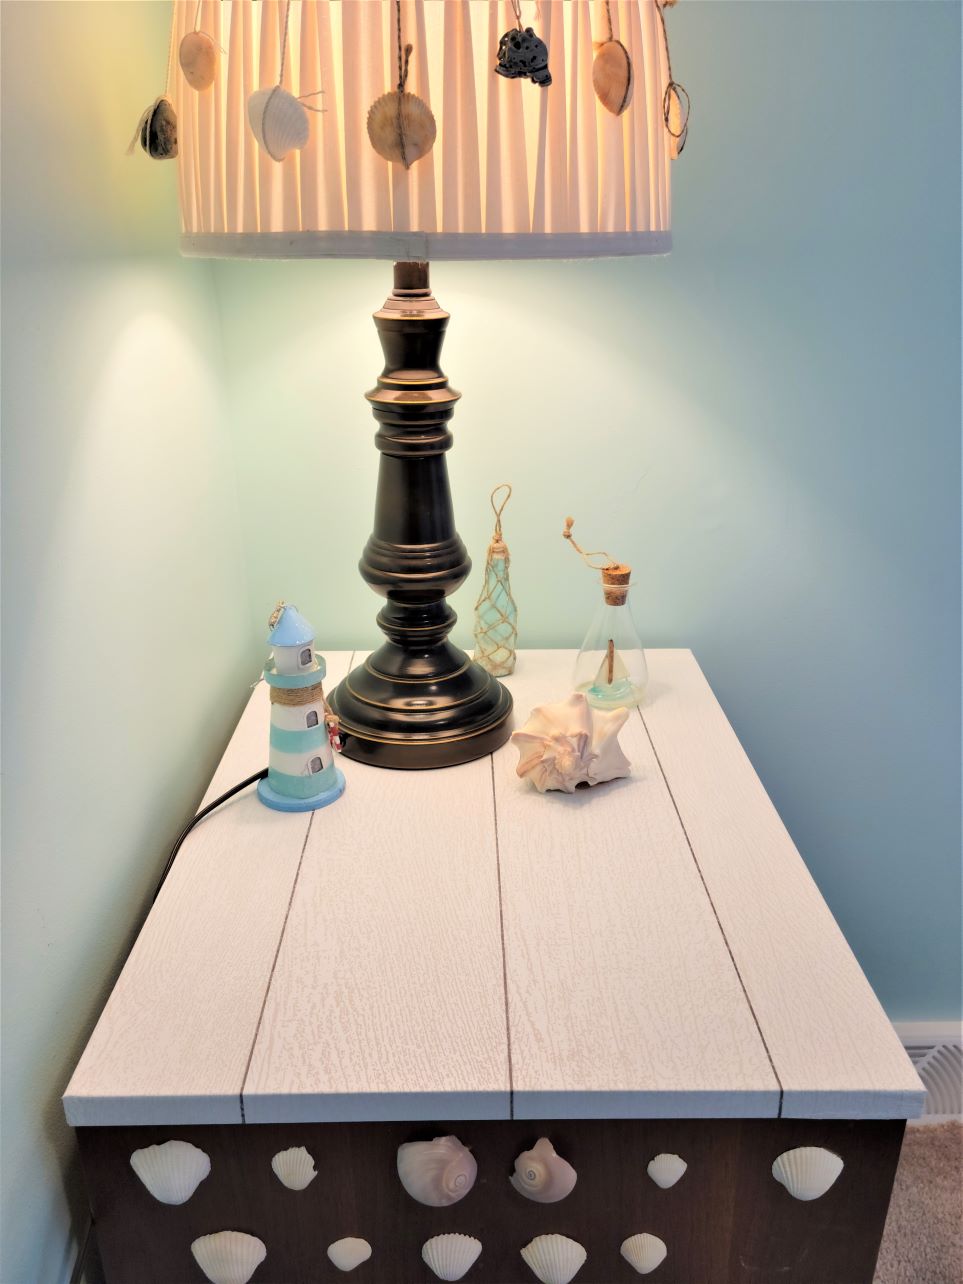
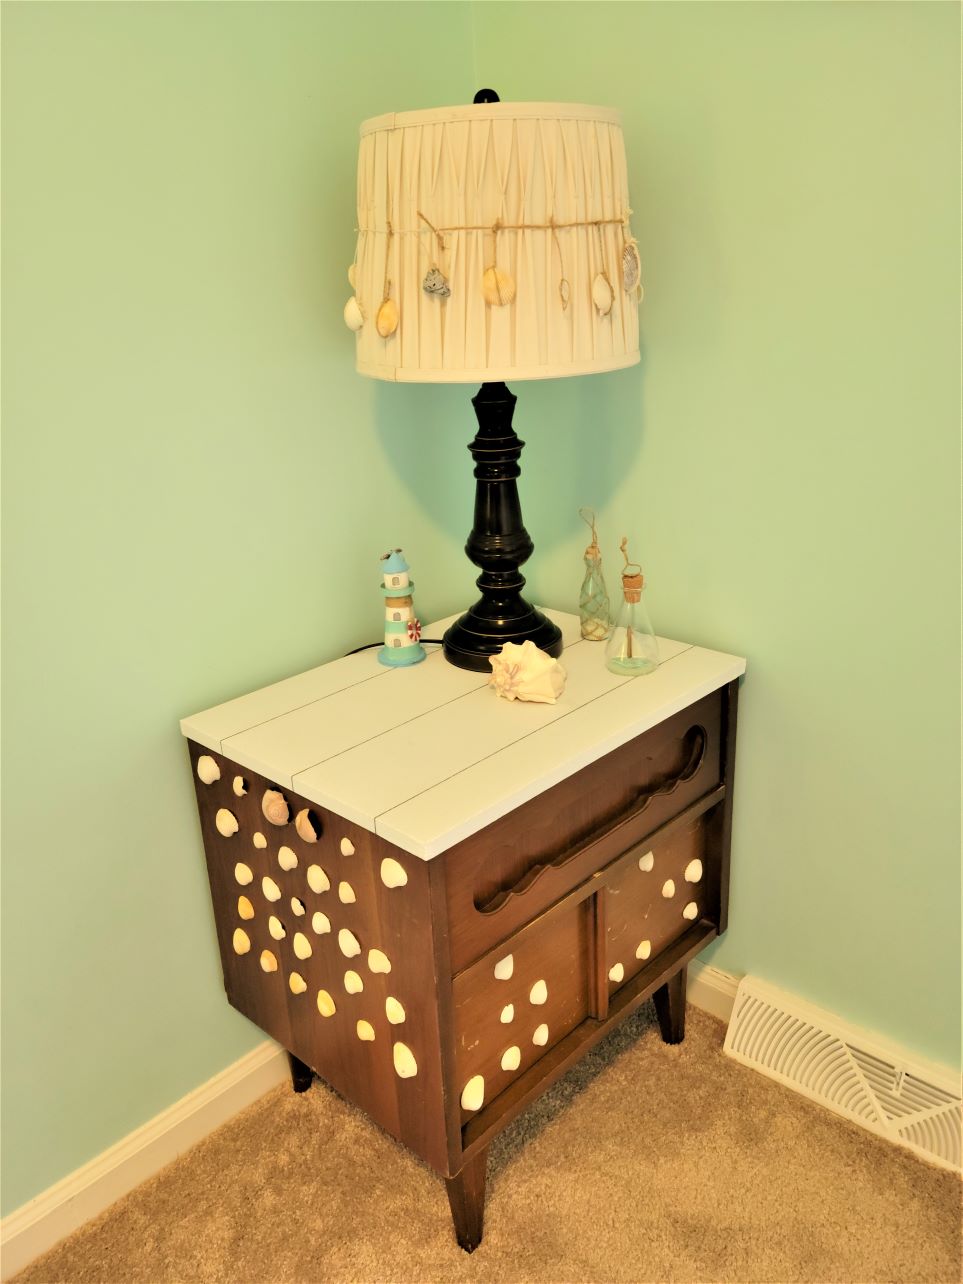
Shiplap peel and stick wallpaper is a brilliant alternative to real shiplap not only because of the benefits of peel and stick wallpaper but because it looks realistic. And, what better way to change the appearance of furniture that looks boring (or ugly)? That’s right: peel and stick wallpaper isn’t just for walls; you can apply it to furniture, too! After I recently covered several small tables with shiplap peel and stick wallpaper, my mom visited and thought the shiplap veneer was real wood. An important furniture caveat to keep in mind, though: if you intend to keep the furniture’s finish intact, do not use it on lacquered furniture as it will remove the lacquer. This isn’t a problem if it’s an old piece of furniture and you don’t intend to preserve its original finish; just don’t use peel and stick wallpaper on it if you want its lacquer intact.
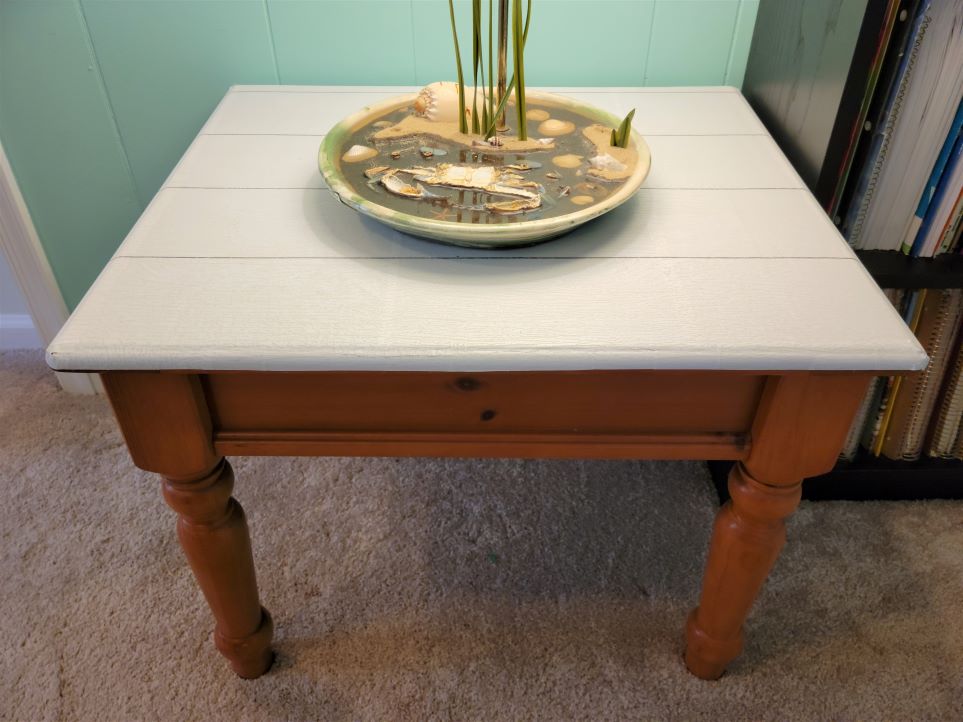
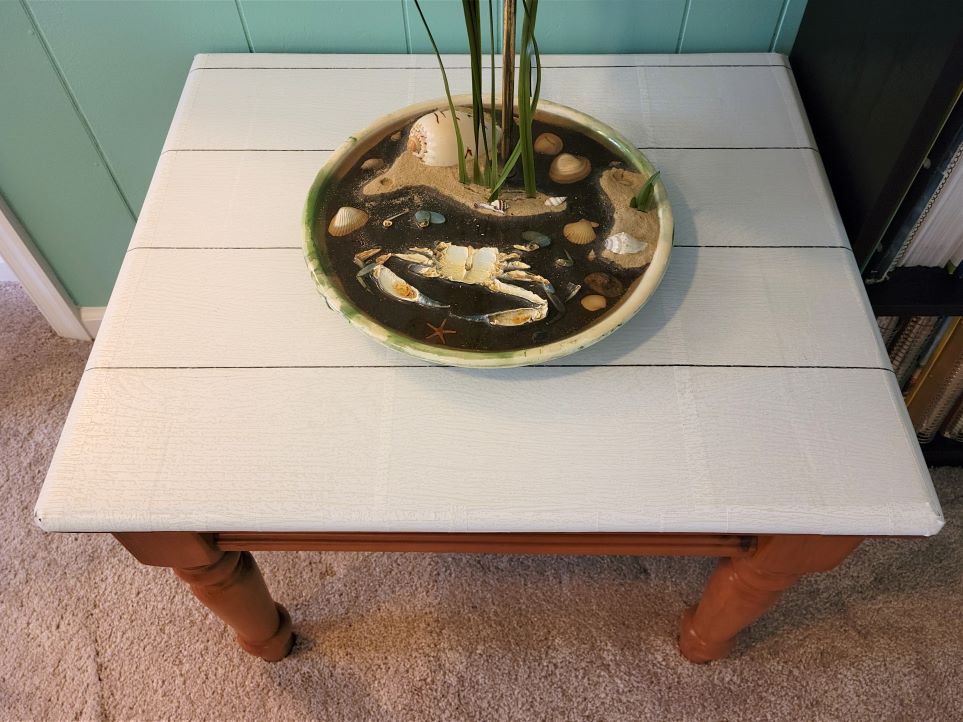
Covering your furniture in peel and stick wallpaper is perfect when you want a fresh furniture makeover without having to sand and paint (and without having to buy new furniture). Applying peel and stick wallpaper does take careful effort and patience, but it’s a lot less effort and time than sanding and painting. And you can always remove it! There are so many placement options, too: inside a bookshelf, cupboard, cabinet doors, dressers, etc. The reason I covered four small tables in it is because I had some leftover from my original project: a large cabinet. I thought, ‘why not use the rest on these old tables?’ It really improved the look of my space. Instead of several end tables with a different colour of wood each, I now have several end tables with an identical ‘finish.’ That really tied the living room together in a more coherent look.
How to Use Peel and Stick Wallpaper on Furniture
Before You Begin: Tips to Tease Out the Trickier Parts
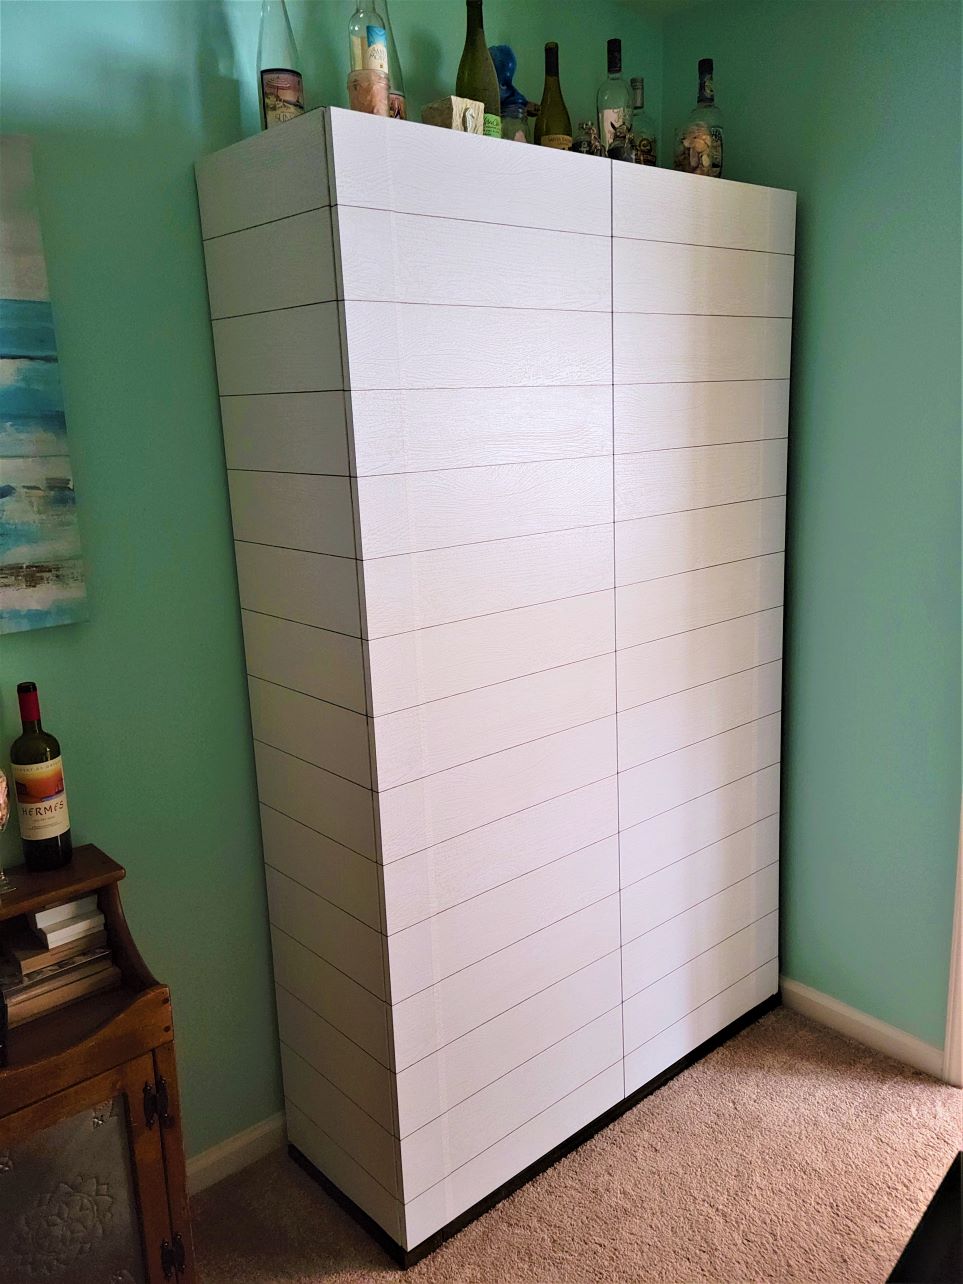
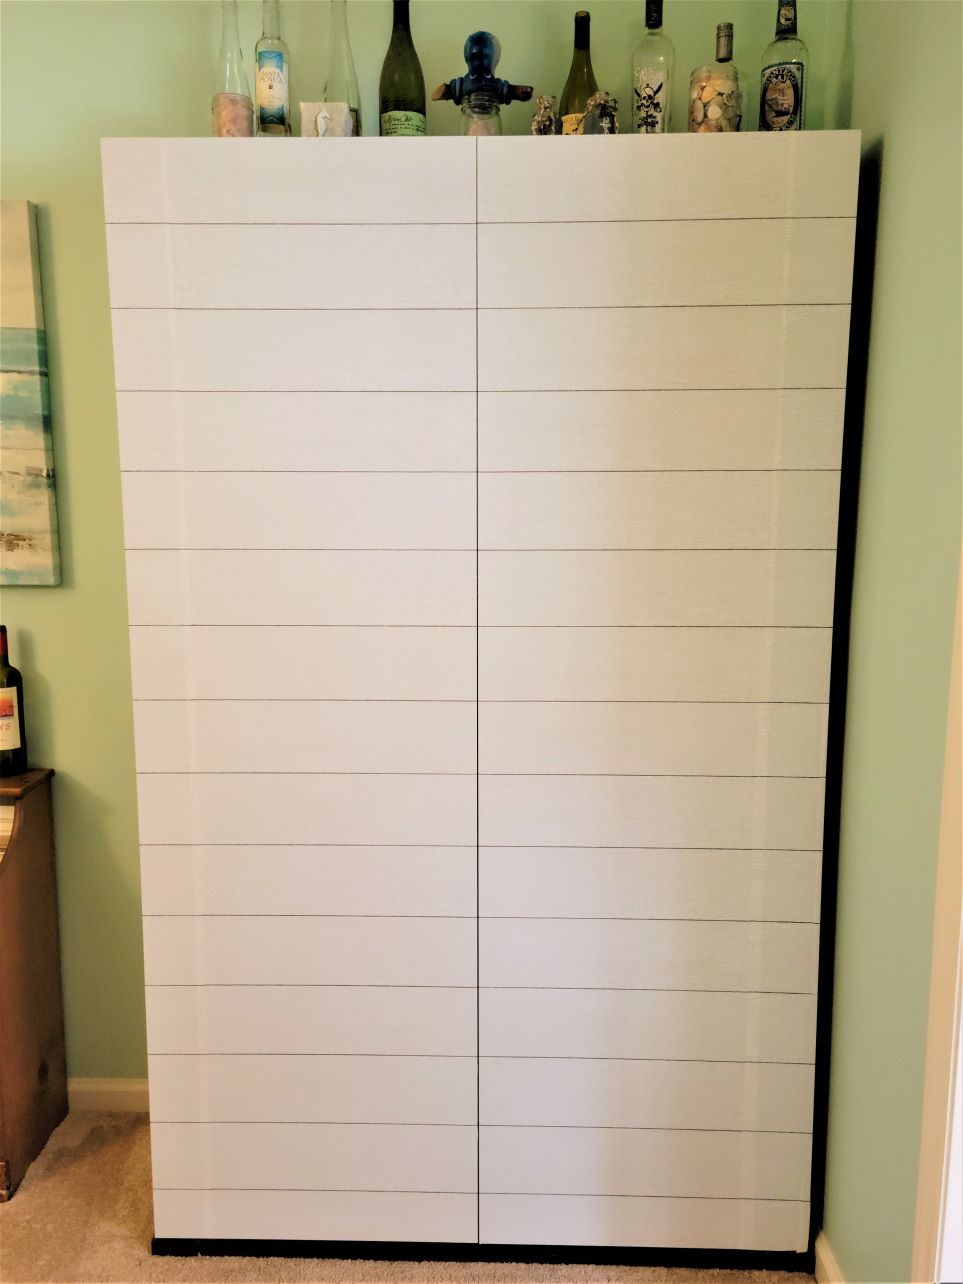
Applying peel and stick wallpaper to furniture can be really simple or really tricky, depending on the shape and size of the piece you’re working with. My toughest job was that large cabinet, which is over six feet tall. The reason it was so tricky was because I applied the paper vertically, with the cabinet standing in place, so that I wouldn’t have to lay it horizontally on the ground. Moving it is quite a feat and after already relocating it, I didn’t want to move it again. (Side note: applying peel and stick wallpaper to your actual walls requires even more standing and reaching but with the major advantage that walls consist of one mostly continuous and flat surface.) But despite some initial challenges, applying the paper really wasn’t difficult; I just had to learn what worked and what didn’t. For vertical application, do have another person help.
Smaller pieces of furniture are easier to work with because it’s advantageous to apply paper horizontally onto tabletops. You have more control applying pressure to the paper from above than from the side, thanks to gravity. And smaller surfaces are nice because the paper size you need will be smaller, and that’s easier to manipulate since you won’t have as much paper to control at a time. The less paper you’re sticking on at any one time, the less you have to tackle air pockets and alignment issues.
For first-timers, it’s best to start with a smaller piece of furniture. This gives you some practice, especially on corners, before moving on to larger pieces. Start with a night stand, perhaps, before you tackle a more important cabinet in your living space. Once you have tangible experience and are familiar with the process, you’ll be in good shape for bigger jobs!
Paper Strip Alignment
The trickiest part of applying peel and stick wallpaper is making sure each consecutively placed sheet of paper lines up perfectly alongside the other to create a seamless design. How careful you are about this is entirely up to you and your tolerance for small visual imperfections. I found that, maybe with a few extra tries, it wasn’t too difficult to align the shiplap peel and stick wallpaper strips perfectly so that the lines (in between the ‘planks’) connect seamlessly. It just takes patience and perseverance, and the end results look nearly immaculate when finished with care.
Pre-cutting Paper Pieces to Fit
Another tricky part of applying peel and stick wallpaper is cutting the paper to fit. This is easy when applied on a neat flat surface with straight edges. It’s difficult when fitting paper over lips or curved edges. I found that it helps to cut your pieces with a lot of slack. Then, trim the slack with an X-Acto knife. Just cut with caution (it’s sharp), and keep the knife secured somewhere safe. If your shiplap peel and stick wallpaper has a raised texture to its design, it can be tricky to cut a straight edge with the X-Acto knife. The knife tends to travel alongside the curves of the design minutiae. This unfortunately results in a very squiggly edge. Unless your wallpaper is smooth, limit your X-Acto use to edges you’ll tuck away (such as under the lip of a table) and pre-cut the rest with scissors.
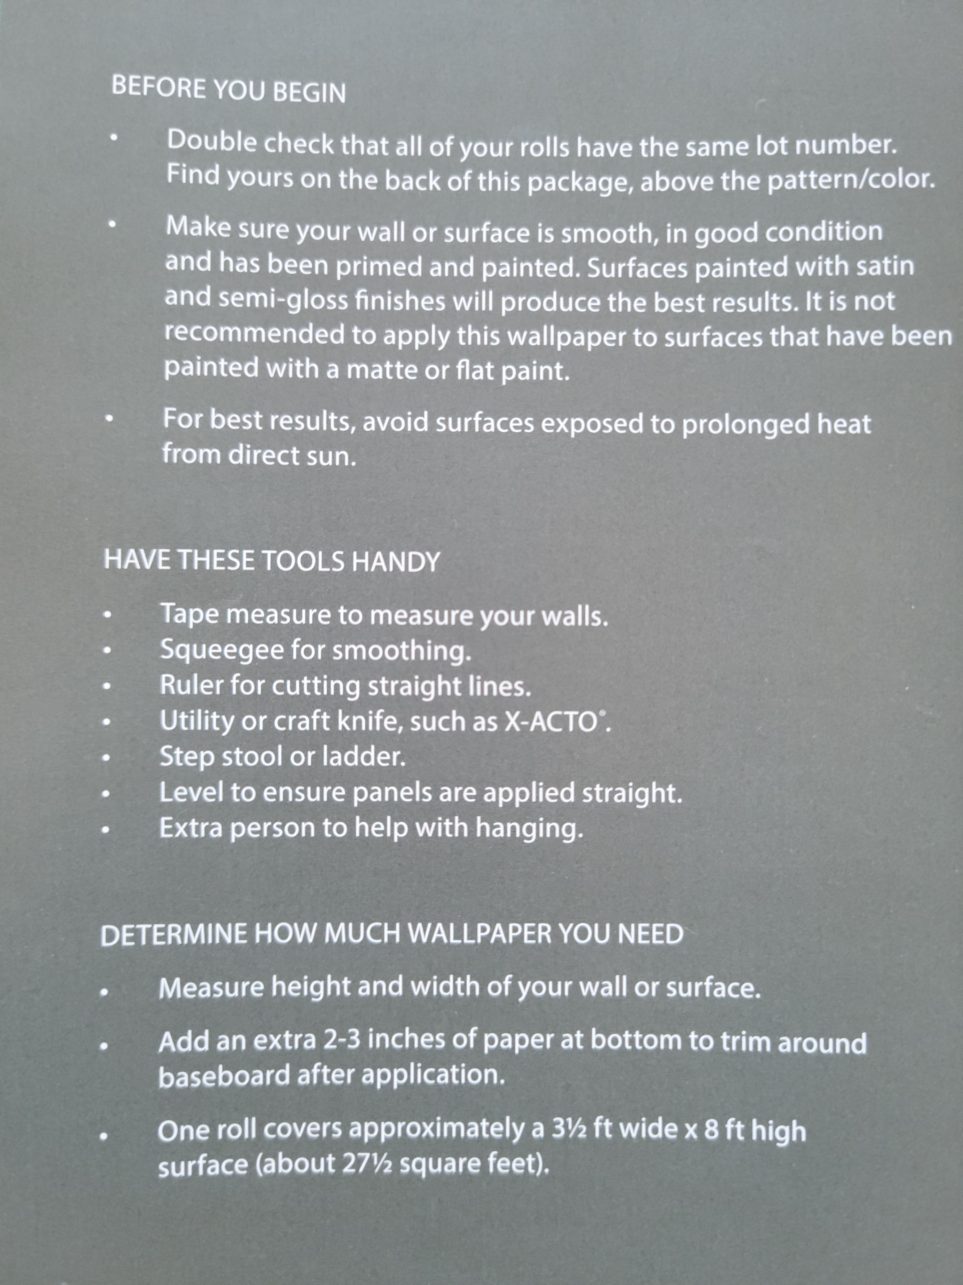
1. Measure Your Coverage Area and Order Enough Rolls of Shiplap Peel and Stick Wallpaper
This first step is one that I initially neglected! I must have glanced at the advertised square footage for the one roll of Threshold shiplap peel & stick wallpaper that I bought and assumed it would cover my giant cabinet. Wrong. In the process of applying the paper I realized I was a little short and would have to order a whole other roll (thus, covering additional small tables ensued). So I had to stop mid-project and wait for the next roll to arrive.
It sounds like a simple and innocuous step, but don’t assume the amount of paper you’ll need based on a visual estimation. Get out a tape measure and measure the height, width and depth of your piece of furniture. Area = length multiplied by height. Do this for every surface you intend to cover, and then add the surface areas to come up with a total. Peel and stick wallpaper is sold in rolls of various square footages. You will need to purchase enough rolls to total more than the amount of square footage you will cover. This is because you need to allow for slack with every cut, and that will add up several extra inches – typically more than you predict. And if you don’t already own one, order an X-Acto knife.
2. Set Aside a Block of Time and a Workspace
This is a no brainer but so many of us are anxious to get started on a project already. It isn’t helpful to have to stop a project partway through because you hadn’t set aside enough time to complete it. Also, make sure you had an adequate workspace that is free from interruption. If you will lay a tall piece of furniture on its side, for instance, you’ll need to designate a cleared space on the floor for this. Make sure that you have the time and area to work for the designated amount of time you need to complete the project. And bump up some tunes while you’re at it!
3. Cut the Paper
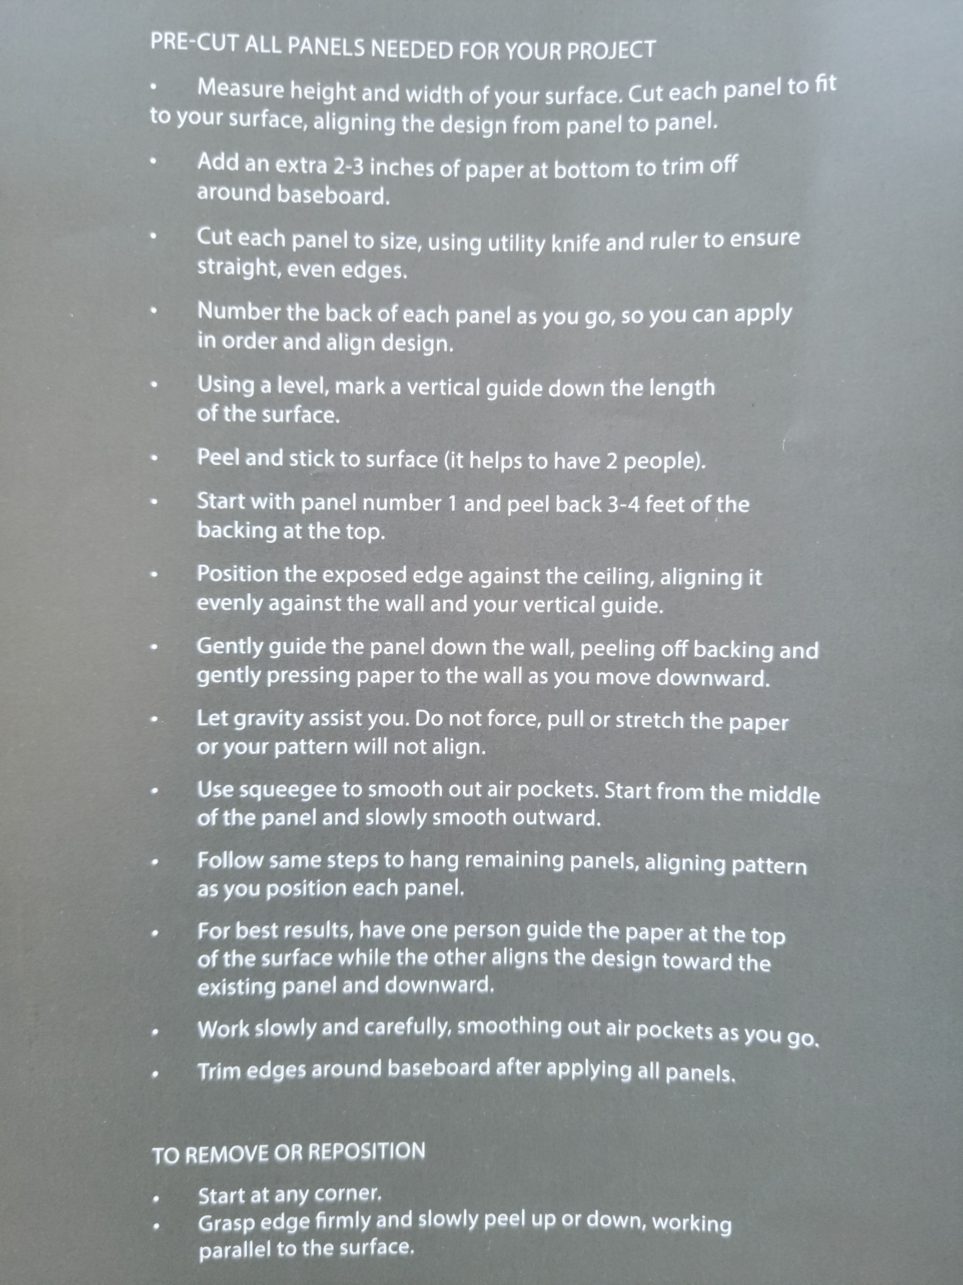
Once you decide which orientation you want your paper to be displayed (i.e. vertical or horizontal), measure the length of the area and cut enough paper to cover that length, allowing a generous amount of slack. Don’t use so much slack that you end up wasting paper by trimming substantial excess, but it’s better to err on the side of too much than not enough. Cut enough pieces from the roll to cover the surface you’ll work on, and be sure to account for lips and edges where you will fold the paper down and over.
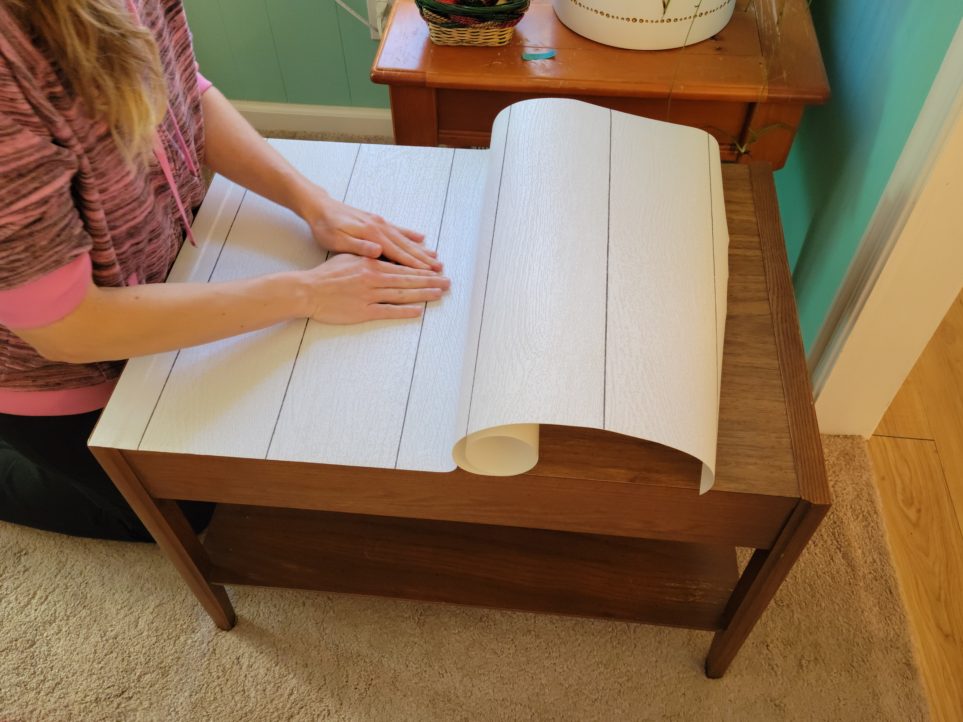
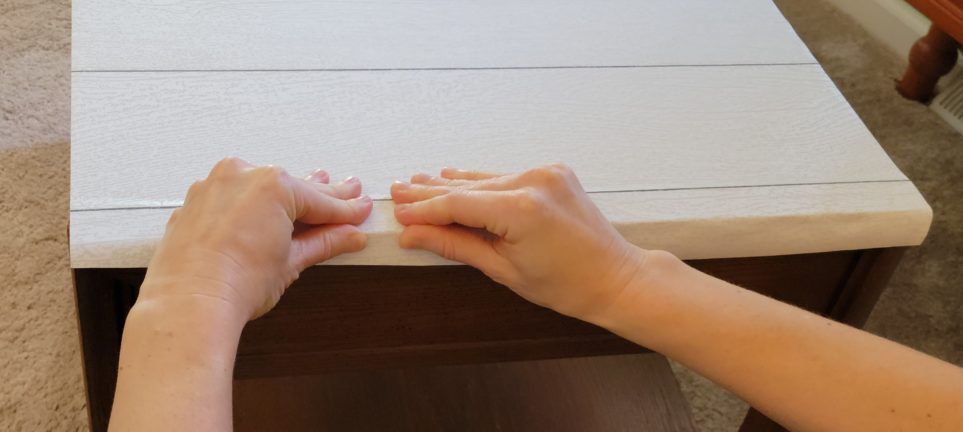
4. Carefully Align; Then Apply By Peeling Away Just the Top Section Where You Adhere
The most important two things to do when applying the paper are:
- Align the paper so it’s straight
- Constantly smooth out the paper from the top center and down and toward the sides
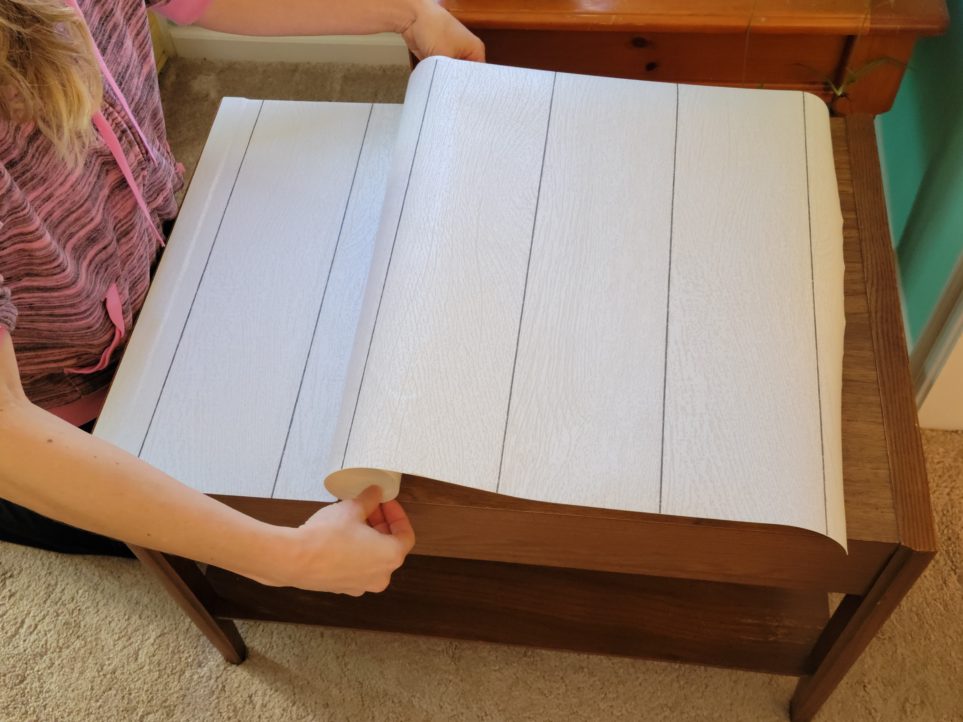
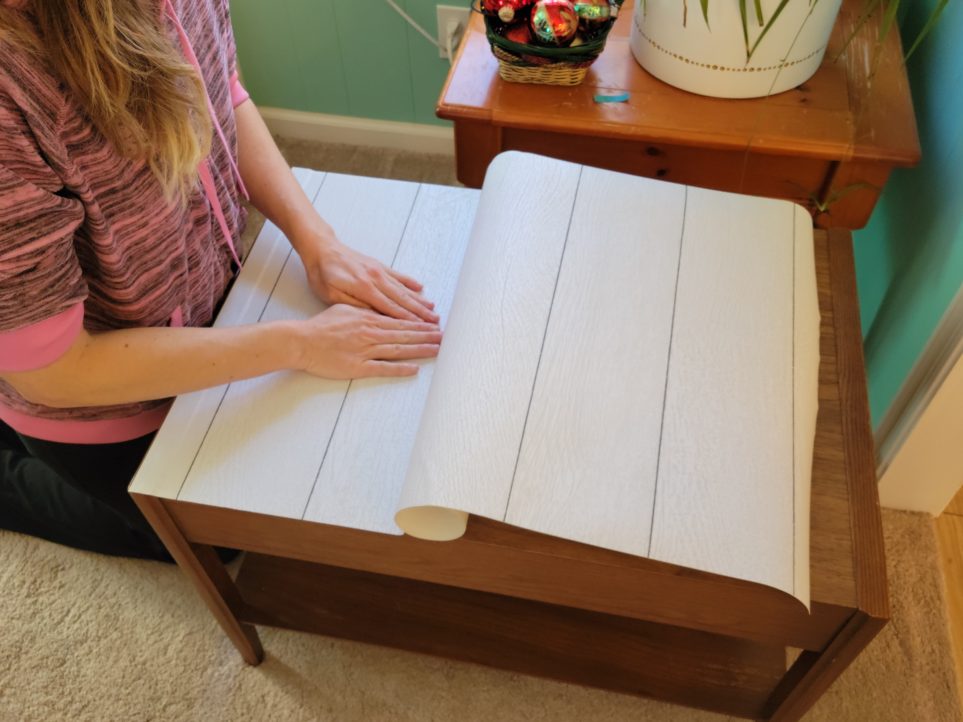
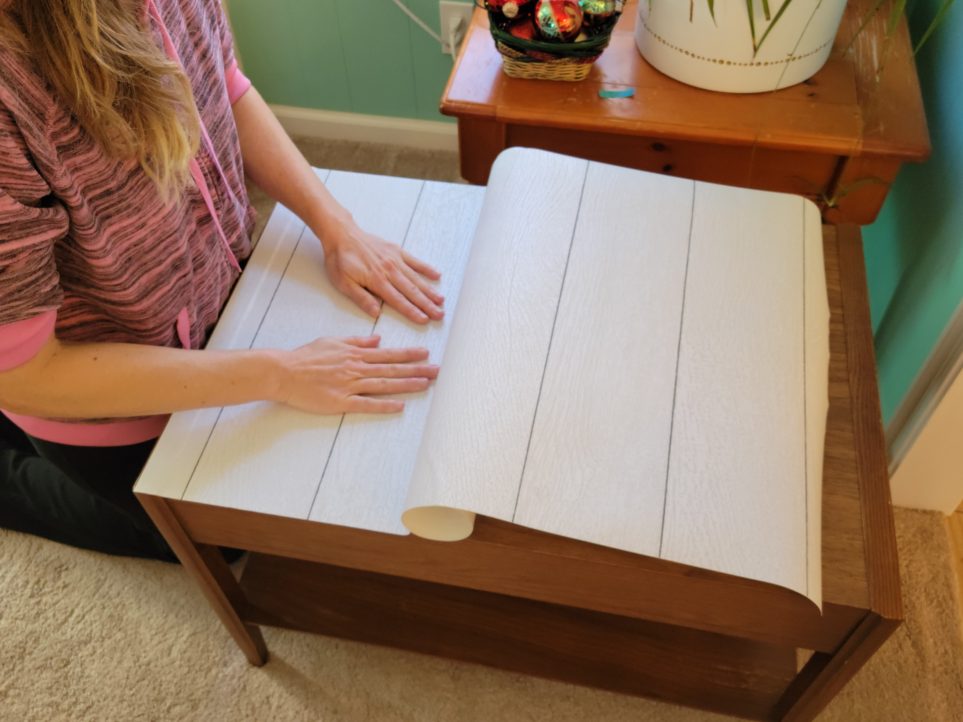

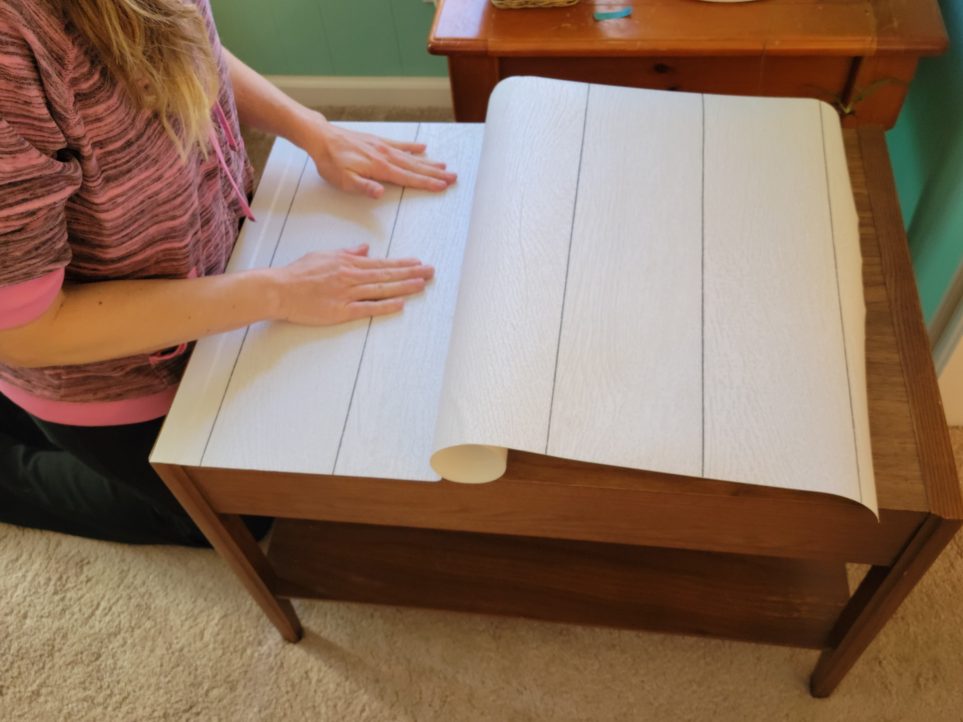
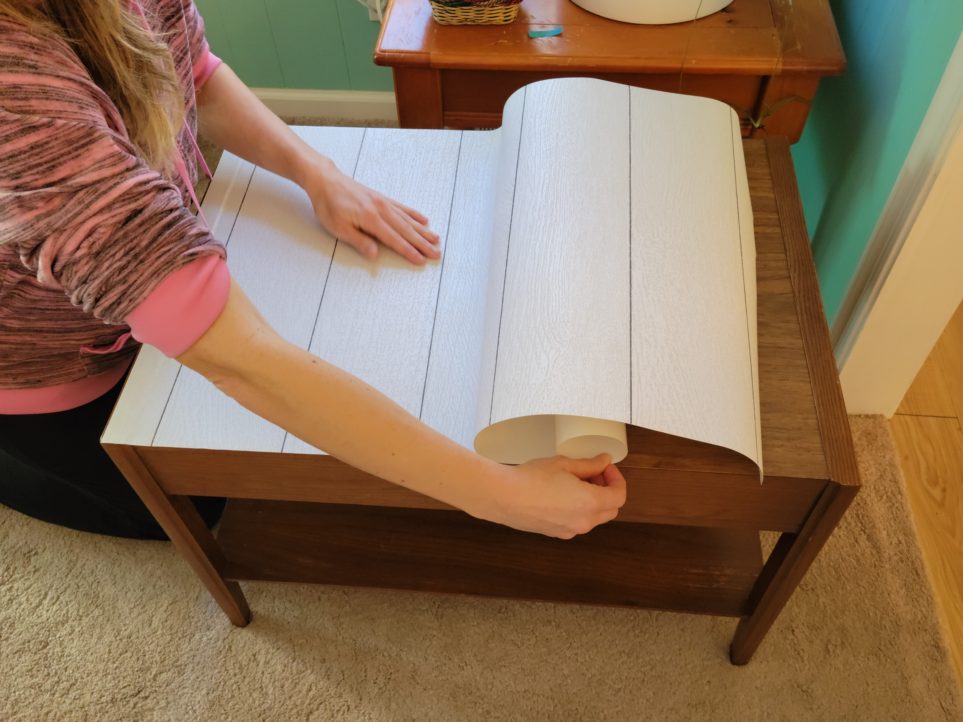
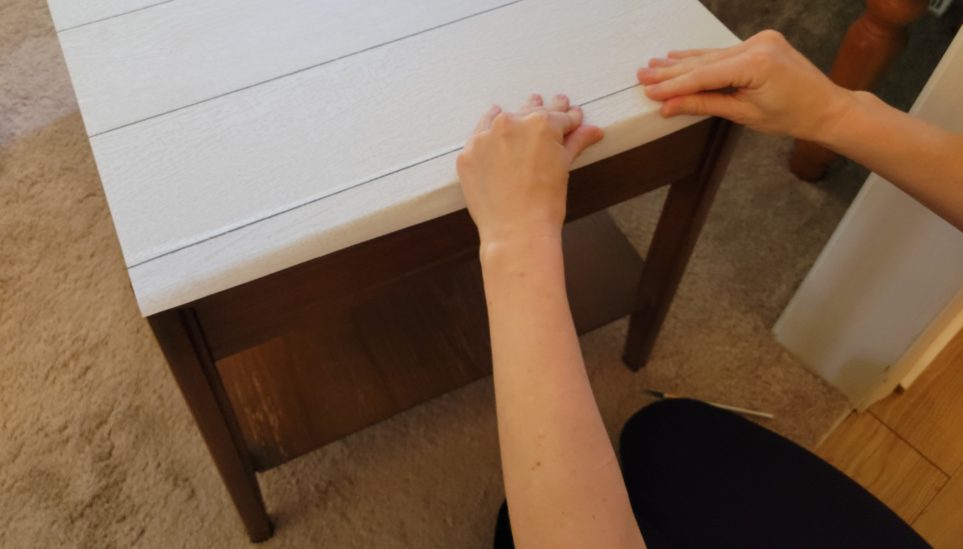
Before you start to stick the paper down, make sure it’s as straight as possible. You may have to peel it back up a few times after flattening it down only to find it just so slightly off center. That’s okay; just keep at it until it’s straight to your satisfaction.
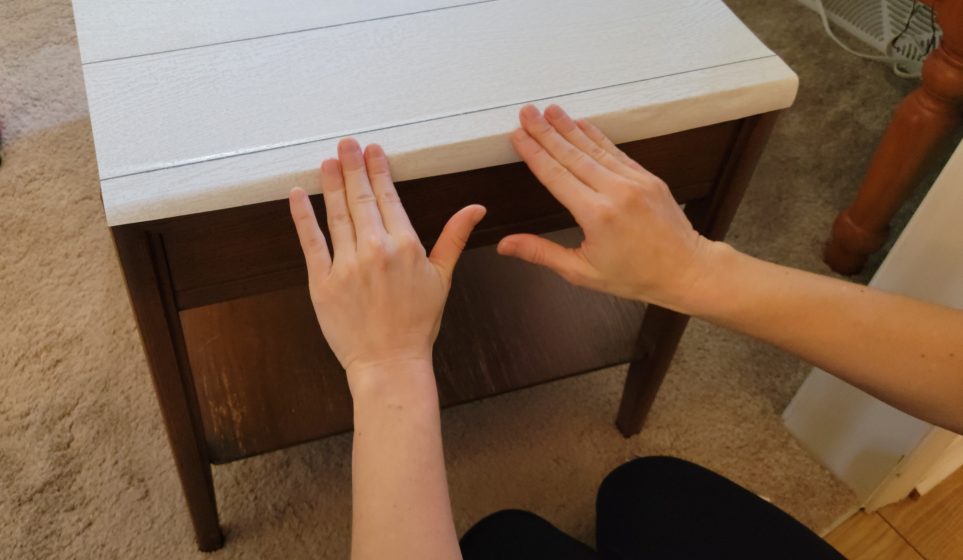
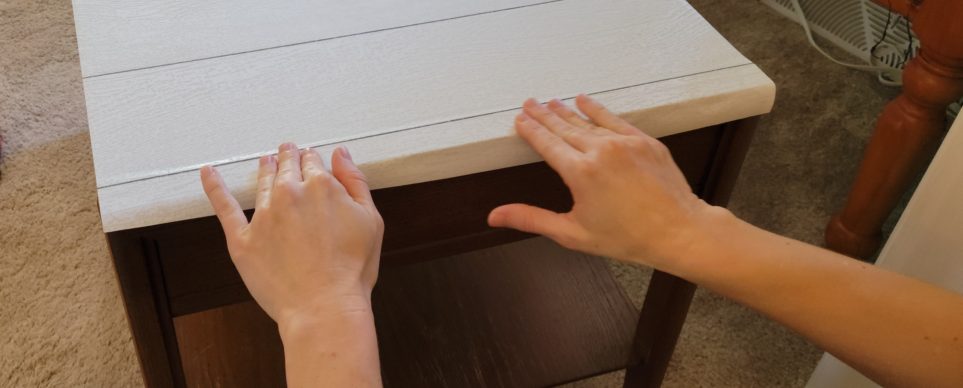
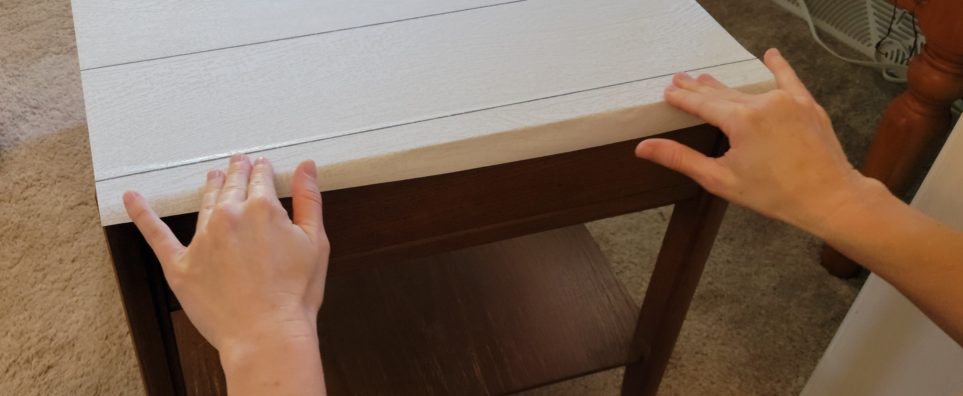
As you are pressing the paper down, always press from the top center where you begin, and flatten your hands and fingers to firmly press out to the edges and down. This is to prevent air bubbles. Air bubbles create an uneven and unsightly texture where air is trapped between adhered paper. This is trickier to deal with when applying paper vertically (it wasn’t an issue for me when applying horizontally), but with the top center moving down and out technique, it was easy to control for. Some people use a brayer for flattening out air bubbles. I found this to be a waste of my money. My hands in fact worked better since I could apply more pressure and could feel any air bubbles. (The brayer’s only use now is a massager, so there’s that.)
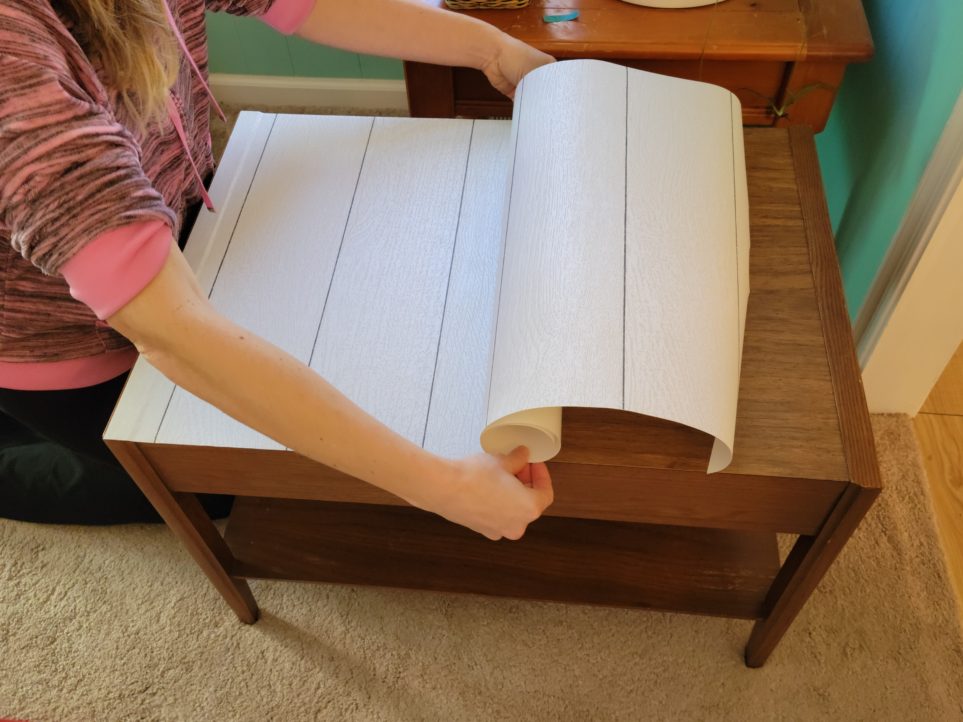
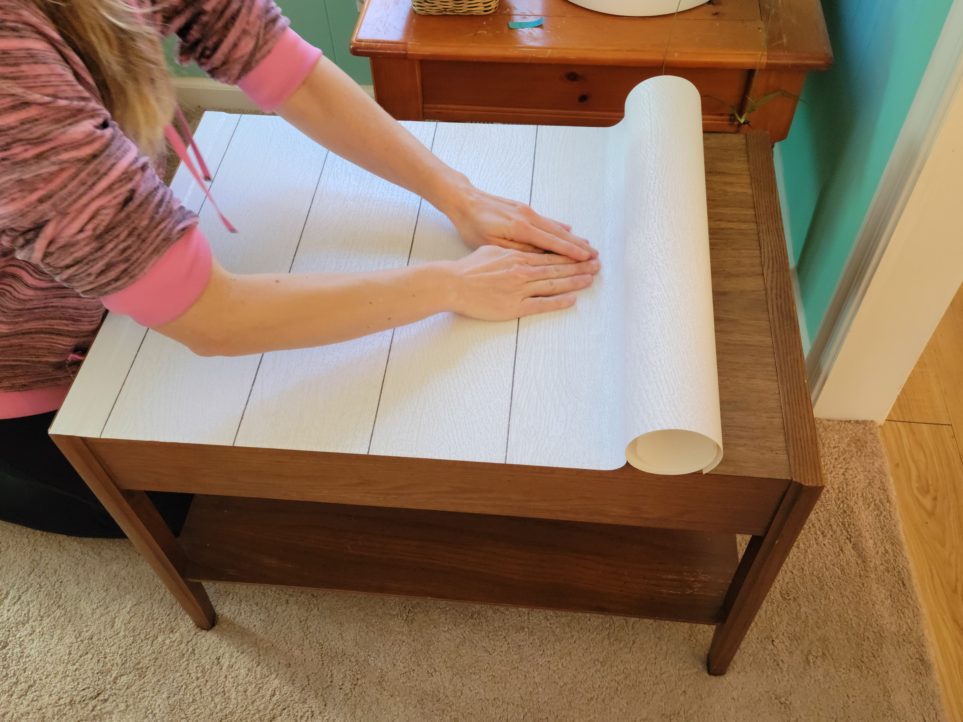
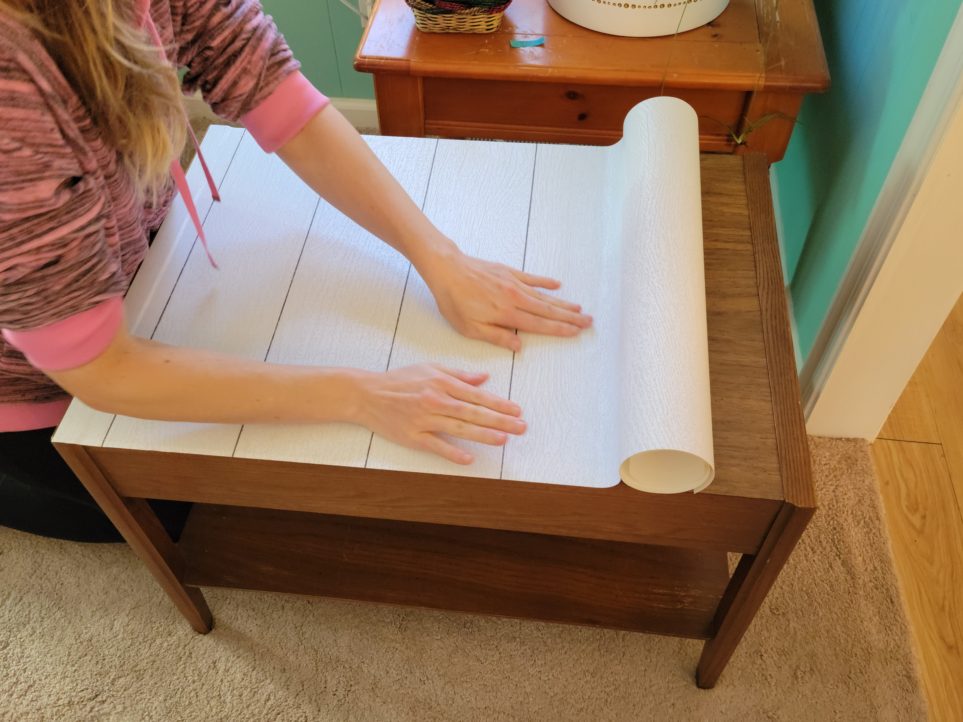
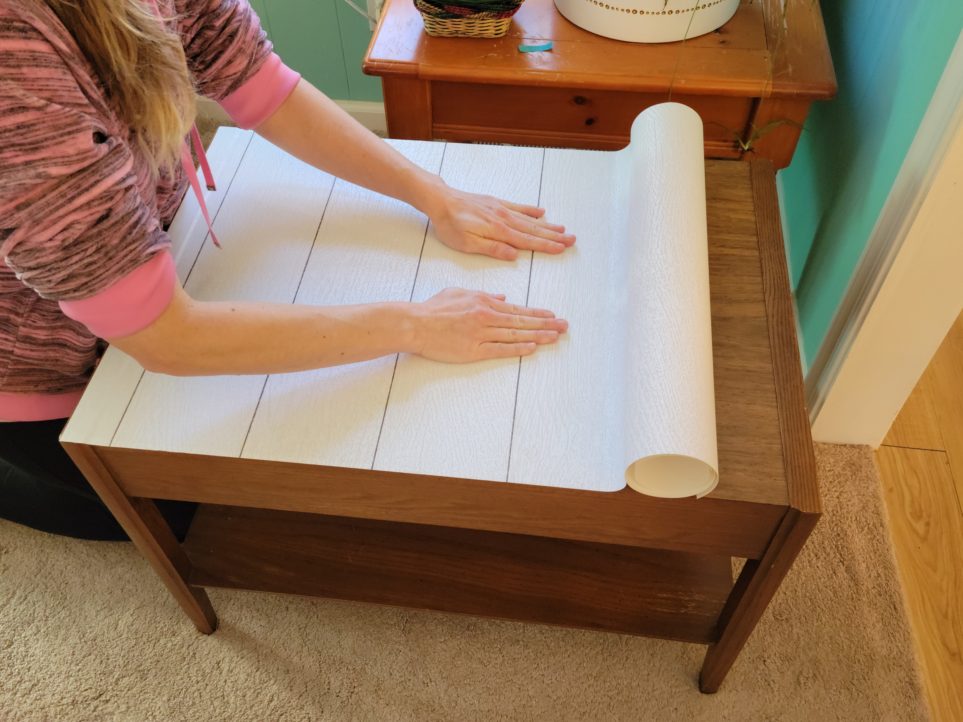
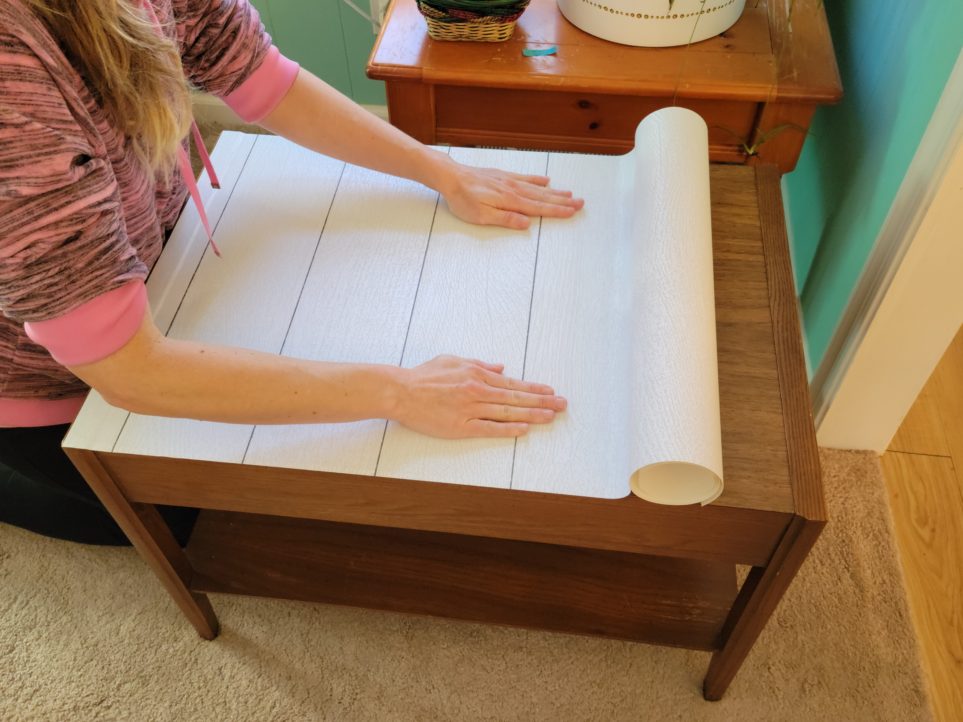
As you continue to carefully and patiently press the roll of paper onto your surface, you’ll simultaneously pull off the backing from underneath to continually reveal more of the sticky side. Don’t pull more than you need to stick at any given time; just allow enough to press down the area you’re working on. If you pull too much of the backing off, the paper tends to stick itself wherever it wants and you’ll constantly have to peel it free.
5. Tuck Edges and Trim As Needed
The difficulty of fitting paper onto the edges of your piece of furniture depends entirely on the shape of it, as mentioned above. It may be easy to tuck an uneven edge out of sight under a lip. This is why cutting extra slack is so helpful. Even if that’s not an option, an imperfect edge isn’t the end of the world if it overlaps another piece of paper. Careful measuring (step #3) can prevent these issues.

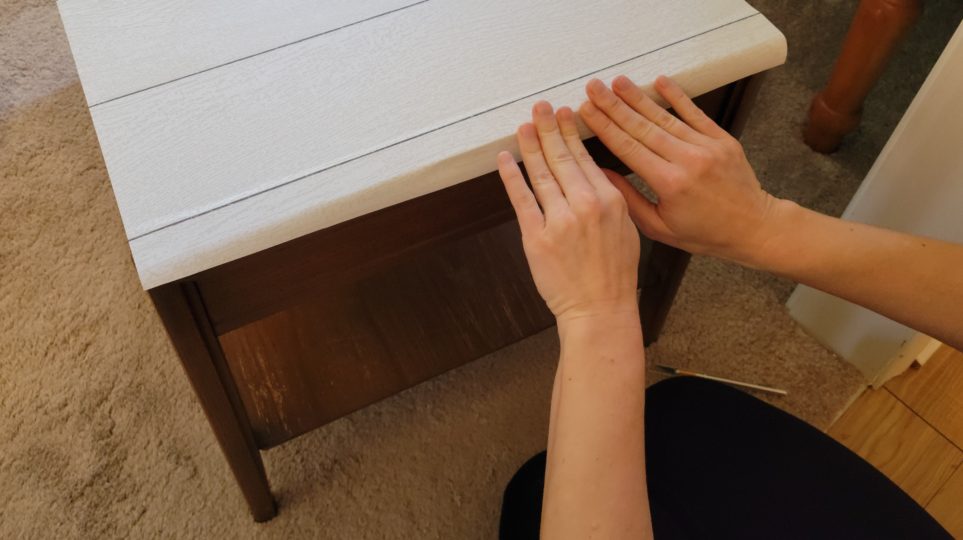
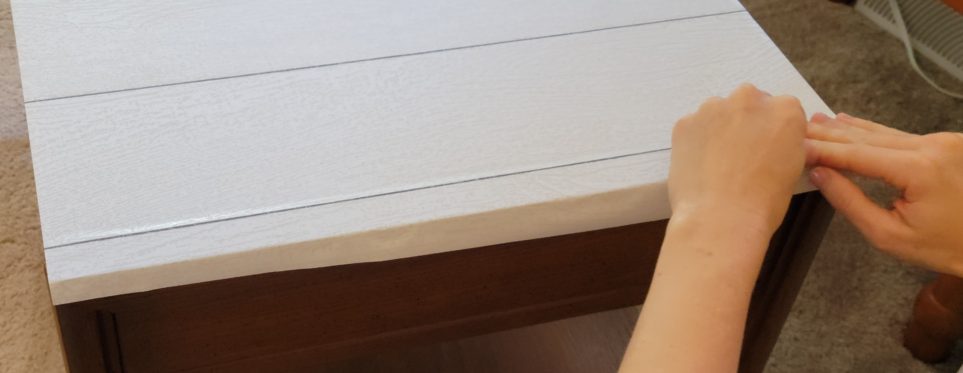
Press the paper down and over an edge with as much tension and precision as you would a flat surface (step #4). You’ll likely need to apply extra tension as you smooth across an edge and fold it over underneath the lip. When a substantial portion of the paper is still not stuck to a surface, less than an inch will not stick as easily (as is often the case with a narrow edge). So you may have to work the paper over and underneath narrow edges before it starts to stick, covering one four-inch-across portion at a time.


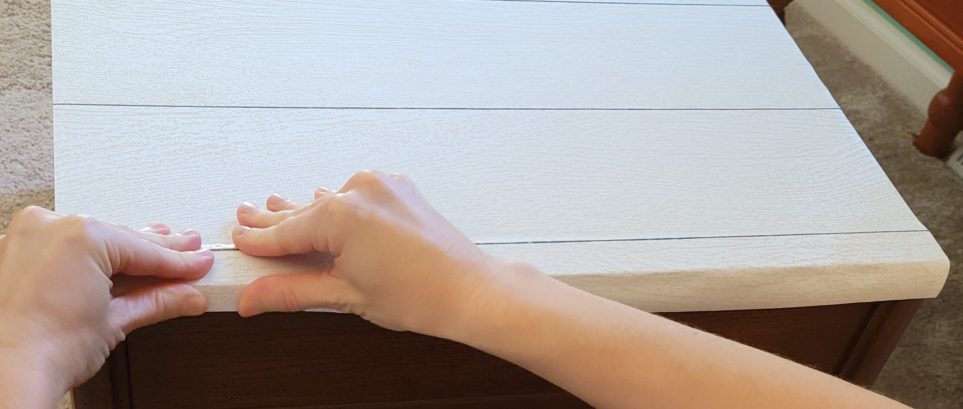
6. Align Consecutive Portions of Paper Just Alongside Each Other OR with a Tiny Overlap
Most peel and stick wallpaper won’t be wide enough to cover a piece of furniture without adding at least part of another section alongside the first stretch. I found that it’s easiest to allow a slight overlap when you apply the next piece alongside the first one, especially if you are dealing with a possibly unevenly cut edge. Make it as narrow as possible, maybe ¼ inch – ½ a centimeter or less. It may not be as perfect looking to see a tiny overlap (though it may not even be noticeable, especially if your paper is darker than the surface underneath), but it certainly looks better than an unintentional gap of bare wood peeking out between the two edges. If you are a pro and can match up stretches of paper exactly beside each other with no gap, that is ideal!
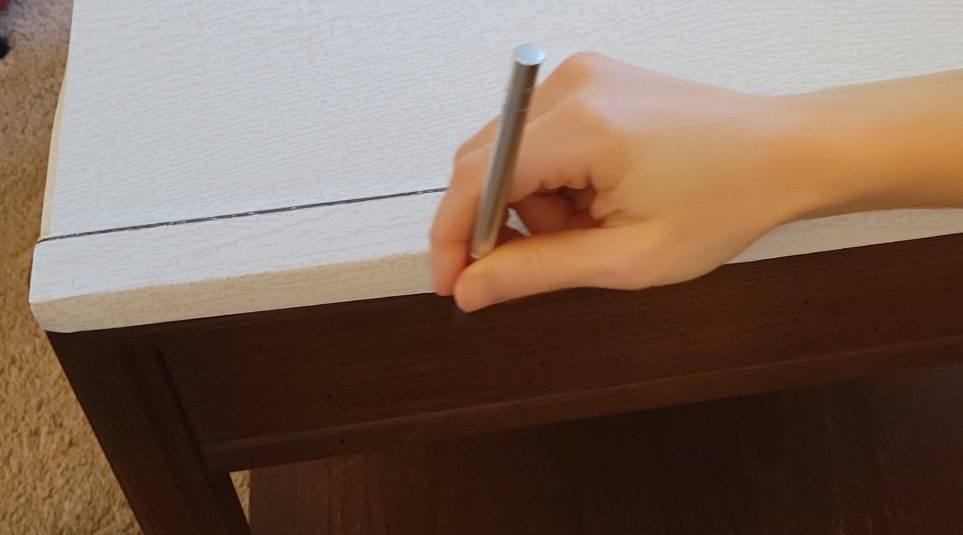
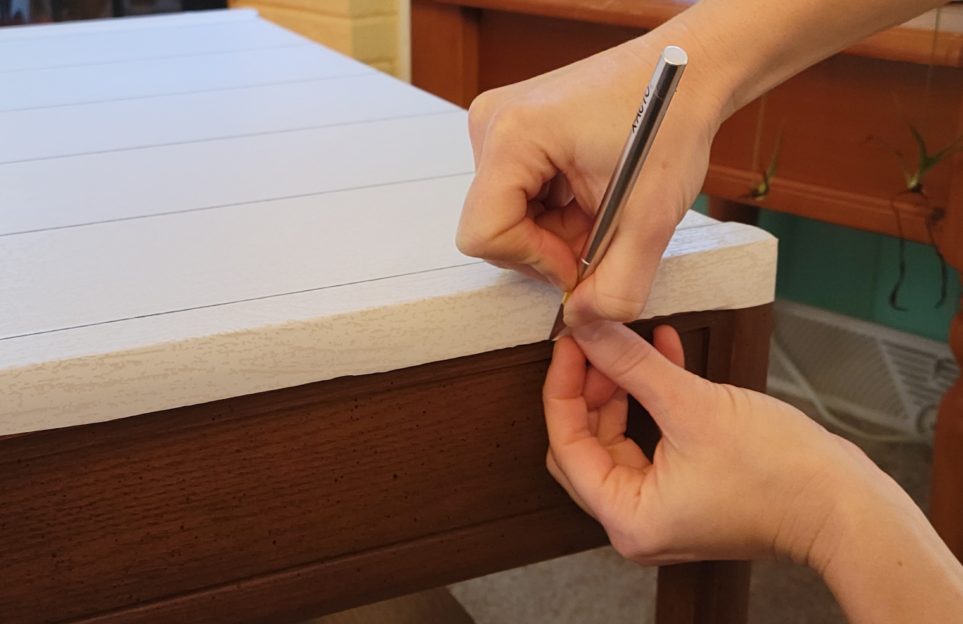
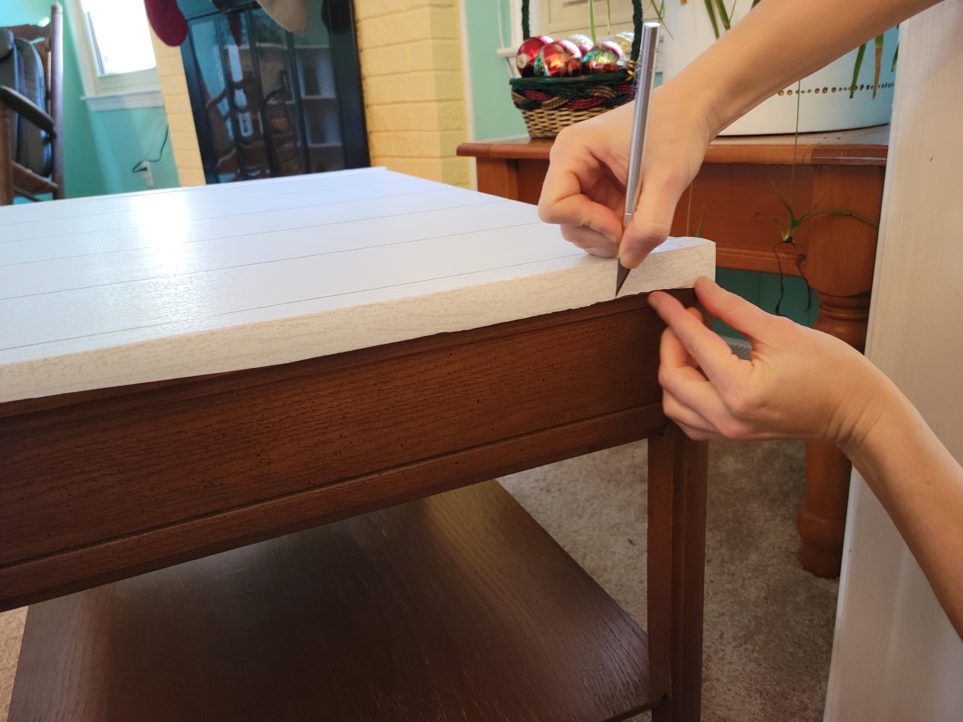
7. Fold Corners Over by Cutting a Square Out of the Paper’s Corner Slack
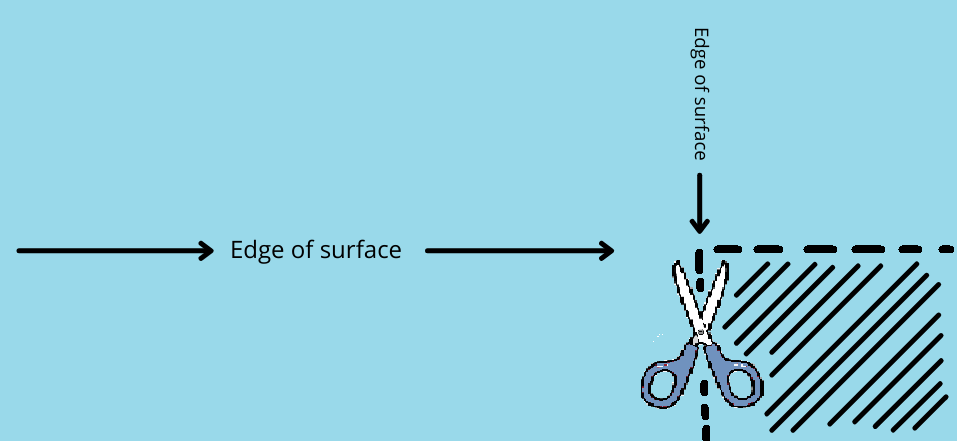
Where your paper overlaps the edge of a surface at a corner and you need to fold it over, make a cut with your X-Acto knife parallel to the edge of the surface starting where that surface ends, to continue a line in that direction. Then, you can neatly fold that edge under. For the perpendicular edge/other side of the corner, do the same. Cut a line in the paper parallel to that edge of the surface starting where the surface ends, and then tightly fold that piece down.
If you follow these tips and steps, you will probably surprise yourself with how great your shiplap peel and stick wallpaper furniture looks. It’s amazing what a transformation it makes!
Bonus: Peel and Stick Wallpaper for a Closet Makeover
If you had a good experience applying shiplap peel and stick wallpaper to furniture, why not pop some on the walls in a closet, too? Whether you continue with the shiplap/nautical theme or want to make a separate mini-theme in a closet, the good news is it’s a small space so not nearly as daunting as an entire room. Shelving can complicate things, but it also gives the benefit of using smaller pieces at a time – which can actually be easier to align. Just make sure you research the brand and find one that you’re confident won’t mar the closet walls when/if you choose to remove the paper later.
After using at least four different brands of different coloured peel and stick wallpapers for closets and other furnishings, I experienced varying levels of difficulty with the application. The wallpaper that was thinner and stickier was much more difficult to use. And that can lead to a lot of extra time and effort (not to mention frustration)! Even one brand which offers various colours was difficult to use in a plain colour but incredibly easy to use in a glitter colour.
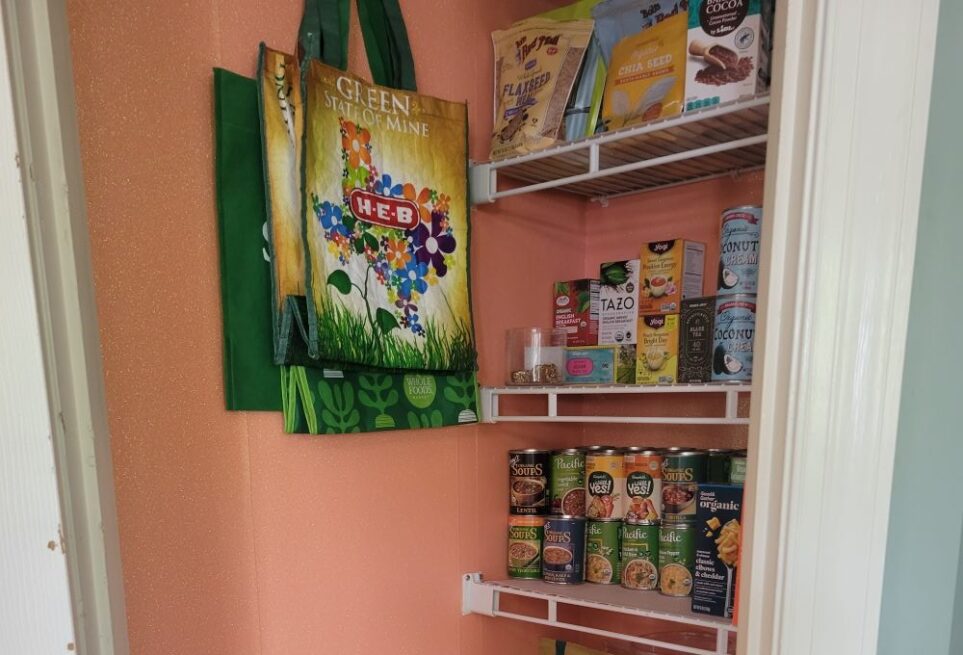
Applying this orange glitter peel and stick wallpaper to the pantry was definitely the easiest wallpapering experience I had. It had a much thicker consistency that was less clingy and more forgiving. It’s the least sticky, but as long as you apply it carefully and don’t leave overhanging pieces, it should stay in place just fine. Plus, if you love glitter, the results are stunning. I get a dopamine hit every time I look at it. There are a few other glitter colours besides orange, too.
The Takeaway: Shiplap Peel and Stick Wallpaper Can Transform Your Space
If you try this and completely botch it, first: congratulate yourself on trying and have a glass of wine or other treat. Second, don’t forget to laugh at yourself. Nobody is going to be an expert on the first try! It’s just furniture, and it’s peel and stick wallpaper so you can remove it and try again. You can reapply the strips you’ve removed so long as you don’t let them collect dust, lint, hairs, or other particles from contact with carpet and such. (Just don’t let the used paper sit out very long because dust will collect over enough passed time.) Third, carefully read through these tips and steps and give it another go when you feel alert and relaxed. Don’t wait until the end of the day when you may be tired or impatient. And don’t rush yourself! Attention to detail and precision measuring/cutting take care and patience.
Shiplap peel and stick wallpaper is a great way to temporarily change your walls (or cupboards, or doors, or furniture) without the commitment of real shiplap. It takes some patience and care, but it looks fantastic when completed. If you like a nautical theme, there are other shiplap-like styles of peel and stick wallpaper that would also make great wall or furniture covering options. If you like the look of shiplap, I encourage you to give it a go and try covering your own furniture with shiplap peel and stick wallpaper! Have questions? Comment below and I’ll be happy to help how I can. Cheers, and best of luck!